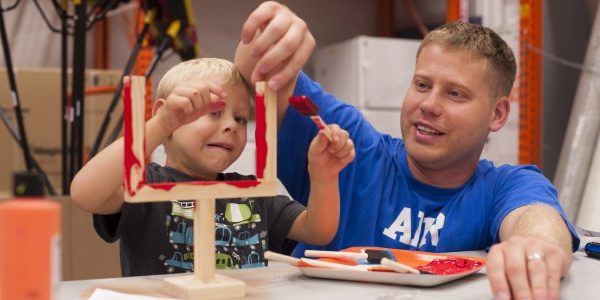
 Kids can be so creative and messy.
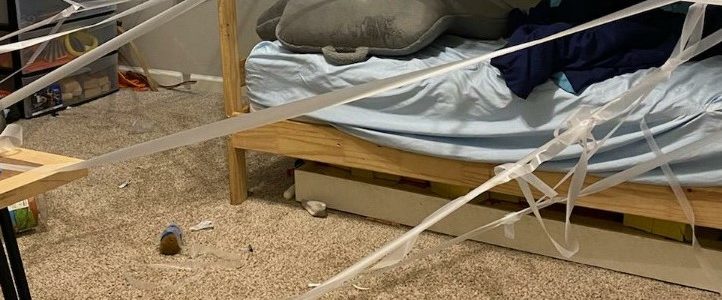
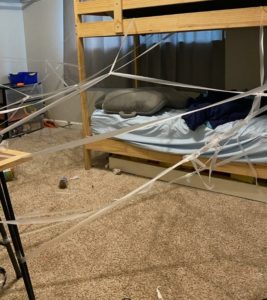
Recently, my grandson Elliott was super busy in his room. He wanted lots of tape and privacy. I was happy that his mom gave it to him.
He may have been recreating a spider’s web or he may have been taking a stab at an obstacle course like his dad had made during their self-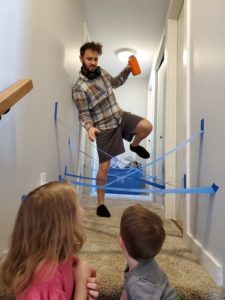 imposed quarantine for Covid a year earlier. It really doesn’t matter because there is great value for kids in being allowed to create even if it uses supplies or creates a mess.
Not everyone agrees with me, but my experience tells me it is true. If we are opposed to a mess, that is about us. If we think materials are wasted unless the end result is some usable item, that is also about us and our story.
My children were creative, so we used lots of paste, glue, rubber bands, construction paper, paper tubes, and egg cartons. We used thousands of crayons, gone through a few dozen pairs of scissors, innumerable pencils, and pens, not to mention compasses, rulers, and other drawing devices. We used rolls of paper and tape and gallons of paint and brushes. We used pounds of flour, butter, and sugar. I can’t even imagine the number of eggs we’ve used. We burned through lots of gas going from place to place to do this and that. In short, we consumed a lot of resources.
Thinking about this makes me happy. Let me share two experiences I’ve had that demonstrate why I’m happy when children use resources and how I know whether they were well used or wasted.
Experience 1
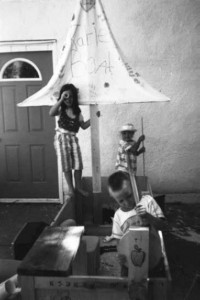
When my youngest daughter was seven, we purchased an item in a large wooden crate. Of course, a large wooden crate is a kid magnet. Kate and her friends were all over that crate.
 One day Kate came and asked for paint and brushes. When I questioned what she wanted them for she said it was to paint the boat. So, I gave her lots of poster paint. I never went to see what was happening. I knew they were painting the wooden crate and that now it was a boat. They hadn’t asked for my help, and I was pretty sure they didn’t want it either.
Next, Kate came and asked me for a piece of material to make a sail. I got a sheet for her. She asked if I could help her figure out how to get the sail to stay up. I went out to the boat, gave her directions, and she and her friends went to work. Throughout the day, they came in and asked me for this and that and I got whatever they needed.
I didn’t go out to the boat again until they came to say they had finished and for me to come and see. Wow! It was an amazing boat for a bunch of 7-year-olds to have created. They played with the boat for a long time. I think they loved it because they had made it themselves.
They had used a lot of paint and glue, material, and other items. The boat didn’t last more than a month or so, but I can tell you they played with it daily, and it brought a great deal of pleasure to those seven-year-olds.
Experience 2
A few summers ago, Jack, my then six-year-old grandson, came in and asked me for a couple of empty paper towel tubes and glue. He said he needed real sticky glue. That meant my good tacky glue. I asked Jack what he was making, and he said, “A robot.” I gave him the glue.
Later in the day, I went upstairs and out to the car. As I went out the back door, there was Jack busily working on his robot. It was a square piece of plywood lying flat on the ground. He had used half a jar of my really sticky glue to adhere two round balls on the board and a length of broken necklace. He had used half a roll of tin foil to cover things, robot style. Hmm, what in the heck was that? When I went back downstairs, I told my husband Jack wasn’t making a robot, he was gluing stuff to a piece of board with my expensive, very sticky glue and lots of duct tape.
The next day as I left for work, I stopped dead in my tracks because right there, at the bottom of the back steps, was a perfect robot. Jack had envisioned a robot from a square piece of board and over the course of half a day had assembled all the materials he needed, and he had created it. I was amazed. It had looked like a junky piece of board covered with glue and odds and ends the day before, but Jack knew what he was doing. He had created a perfect robot.
The robot lay at the bottom of the back steps for four days until it rained. Then the pieces were gathered up, and it went to the junkyard in the sky. Jack’s robot couldn’t be played with or hung on the wall. So, the question I ask you is, “Was it a waste of materials for Jack to build the robot?” My answer would be a resounding “No!”
The boat had an obvious use, but the robot seemed useless. However, in both cases, the child had to conceive an idea. They had to determine what materials they needed to bring their idea to fruition. Next, they had to take the initiative to gather the materials and organize them in order to bring their vision to life.
In both cases, since I was somewhat involved and observed the process, those kids had to problem-solve to make things work out. They worked independently, for the most part, trusting they could figure it out and get the job done. At the same time, they had to determine when they needed to ask for help, and exactly what help they needed.
In Jack’s case, he had to figure out how to get the job done with two younger siblings getting in the way. Yelling or hitting wasn’t an option. He had to use diplomacy. In both cases, the child was able to look at the finished product and beam from ear to ear because they knew they had done a spectacular job. They both felt proud for many days. Their belief in themselves was stronger and their ability to do increased.
When I look at the results from the use of the materials in both cases, I think those materials were used perfectly. They accomplished what paint, glue, junk, brushes, rubber bands, scissors, pencils, pens, and all the rest were designed for—to help people problem solve and create. The use of the materials assisted these children in feeling more capable and able than when they began; to feel the pride of having done something that mattered to them.
If I’d been more involved, or if I’d been worried about how the materials were used, we could have saved paint, glue, tape, and so on, and we would have had less mess. But I hope you can see that what the children experienced would have been far different.
The Value of Using Supplies and Making a Mess
As adults, we do have to pay attention to the use of supplies because children need some guidance, but we should worry less about waste. Think instead of what they gain by creating on their own:
• Increased vision
• Initiative
• The ability to bring the vision to life
• The ability to gather what’s needed
• The ability to problem solve
• The ability to work independently
• Learning when to ask for help and what help they need
• Learning to work well with others
• Developing leadership skills and attitudes
• Learning to use diplomacy
If you decide to see your children’s projects differently—how they feel to your child and what the process of creating is teaching them— you can better evaluate the right use of materials. You’ll be able to let it be about them and not you. Couldn’t we use a few more adults who aren’t afraid to turn their dreams into reality because they spent their childhood doing it?
 Kids
Kids