Tag: holiday fun

From the Archive – A Fun and Messy Easter Tradition

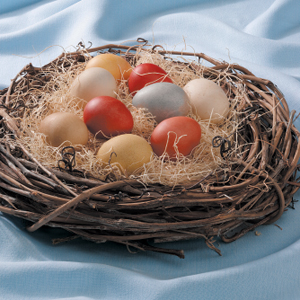
“Mom, come on. It’s almost Easter, and we need to color the eggs.” These words were spoken in a voice of desperation and a full two weeks before Easter. Out came the huge soup pot. In went 5 dozen eggs. Out came 15 cups, vinegar, and boiling water. In went the dye. (Cake decorators have a lot of colors!) Fifteen large spoons followed. Nine chairs around the table. Very tight!

“I want blue.” “No, I want blue.” “Guys, guys, you can all do blue.”

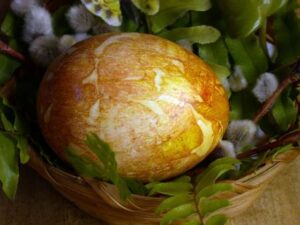
“Barry!!!”, as six, yet to be colored, eggs hit the floor. “Don’t worry, guys; these will be cool, tie-dye eggs. You’ll love them”. Said with all the enthusiasm I could muster.

“Quick, grab the paper towels. Run!”, spoken in a voice of slight hysteria by one child as pink dye moved slowly across the tabletop and onto the floor. I ran for the towels.

“Kate, you must remember to put the lids back on the markers. They’re going to dry up.”

“Stop that, you’re bumping my elbow. Now my tree is crooked.”

“Look, Mom, you really can see my name. You couldn’t see my name before, and now you can. How does that work?”

“Hey, we’re running out of eggs. I only got to color six. Not fair. Can we boil some more?”

And so, it went each year of the forty years that we colored eggs. Nothing changed much, even when we were down to just three at home, Kate, Don, and me. There were still spills, and someone would think we didn’t have enough eggs.

I love holiday traditions, and this egg-dying ritual was one of ours. Some years went better than others, but each one brought us closer as a family. Each one tied us together in a bond that exists today. Traditions matter to children. These are the things that they can depend on: certain foods on the table at holidays, special activities done year after year, and favorite people gathered together. Family traditions were important to me, too.

Let me share some Easter egg-dying tips I learned as our family established this tradition. If you keep them in mind when dying Easter eggs, things will go smoother.

Egg Dying Tips

1. Less is more. Keep it simple, nine cups of dye, not fifteen. Have one cup per person in your family and rotate. If you have fewer family members than colors, rotate anyway.
2. Keep all the eggs, un-dyed and dyed, in egg cartons. They can’t roll; much safer.
3. Cover the table top with two or three layers of newspapers, the whole table. You will save paper towels!
4. No rugs anywhere within a four-foot radius of the table. This is a must. LOL
5. If you don’t live in Montana (as we did), and the weather is good, do it outside! : )

Keep Your Eggs From Rolling

How to Dye Easter Eggs with Water and Food Coloring

1. Before you begin, you’ll need hard-cooked eggs that are completely dry and at room temperature.
2. For each color of dye, find a container that won’t stain or that you can discard when finished. Make sure the container is large enough to submerge an egg or several eggs.
3. Place an egg in the container. Turn it with a spoon. The longer the egg sits in the dye, the darker the color becomes. Remove and place on a paper towel or put into a cardboard egg carton. If you are using Styrofoam cartons, make sure the egg is dry before placing it in the carton.

How to Dye Easter Eggs with Natural Ingredients

Dyed with onion skins
  • Lavender – Small Quantity of Purple Grape Juice; Violet Blossoms plus 2 tsp Lemon Juice; or Red Zinger Tea
  • Violet Blue – Violet blossoms boiled in water; boil a small quantity of red onion skins; Hibiscus Tea; Red Wine
  • Blue – Canned blueberries, use the juice and smash the berries for more juice, heat and strain; boil red cabbage leaves; purple grape juice
  • Green – boil spinach leaves; Liquid Chlorophyll
  • Greenish Yellow – Boil yellow Delicious Apple peels
  • Yellow – boil orange or lemon peels; Boil Carrot Tops, Boil Celery Seeds; Boil Ground Cumin, boil Ground Turmeric; Chamomile Tea; Green Tea
  • Golden Brown – boil Dill Seeds
  • Brown – Strong coffee; Instant coffee; boil black walnut shells; Black Tea
  • Orange – Boil Yellow Onion Skins; boil Cooked Carrots; Chili Powder; Paprika
  • Pink – boil beets; boil cranberries or use cranberry juice; red grape juice, juice from pickled beets
  • Red – boil lots of red onion skins; canned cherries with juice, smash cherries for more juice, strain; pomegranate juice

You can get detailed instructions for natural egg dying HERE. 

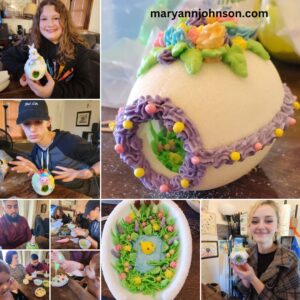
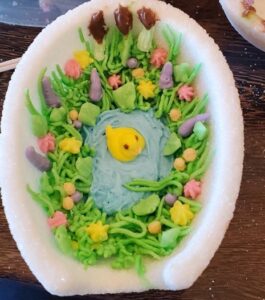
Why not be brave and make some Panoramic Sugar Eggs with your family!

Share your egg-dying experiences, along with tips to help us all have more fun this Easter.

I would love to hear from you, and so would others!

From the Archive – Panoramic Sugar Eggs Your Family Can Make

My Colorado Grands

I’ve taught hundreds of children to make sugar eggs. I taught two groups of kindergartners every year for over 15 years. I taught children how to make sugar eggs in Girl Scouts, community groups, and for the city in Laurel, MT. I traveled to Colorado to help over ninety children in my grands school classes. I flew to Washington, where more grands lived and helped many other children, do the same. It has become an Easter tradition in our family, and traditions matter.

Despite having made hundreds of these eggs for friends and family, I had never made one for myself. So, one year, I made a very large one for the center of my basket (a flat, flower-gathering type basket) and surrounded it with 24 small eggs. It was gorgeous and a real conversation piece the whole Easter Season. I enjoyed that basket of eggs.

When Easter was over, I carefully set the egg-filled basket into my cedar chest stored in our garage. The next Easter, I went to the garage and pulled out the basket. It was in perfect shape. It was as delightful and beautiful as I had remembered. I was excited to display it again in our home.

Then I picked up one of the small eggs and looked inside. NOTHING! It was empty because the bottom had been licked out. Hard to believe, isn’t it? I checked every egg, including the very large center egg. Every egg was empty. I have since thought about how many secret licks and how many weeks it took to empty all those eggs. To this day, the culprit has not confessed, although all the suspects are between 35 and 55. Every Easter, I am reminded of this family experience, and I laugh about it.

The Perfect Easter Experience!

He is risen

Isn’t that a perfect family Easter story? The eggs were empty!! Mary Magdeline went to the tomb, and it was empty!! Jesus was not there; he had risen. What a glorious message and event that thrills the hearts of Christians.

This sugar egg project is perfect for a family. It takes very few supplies, and even a two-year-old can do it with help. I know because I’ve helped many 2-year-olds. : ) Remember that only adults care about the end result; children adore the process. So let them have a free hand, helping only when necessary, knowing that, however they look when finished, your children will be thrilled.

Sugar Egg Recipe and Directions

1. Place 2 cups of sugar and 3 tsp. of water in a zip-lock type bag. You can color the Easter eggs with food coloring for a tinted shell by adding a few drops of coloring to the water before you add it to the sugar. Rub the bag between your hands until all the sugar is moist like damp sand. You don’t want any dry particles, as they flake away when the egg is done. You don’t want it too wet, or it takes too long to dry. I share with the children why there is light inside the egg. We discuss the word translucent. I tell them there are spaces between the grains of sugar that let in light. We talk about why you wouldn’t want to completely cover the top of the egg with frosting or decorations. Just know that some children still will!

2. Pack the sugar into the two halves of an egg mold and scrape the top off with a knife to make it level. Turn quickly onto waxed paper. Children over five can do this part of the process. They will mess up a few times, but will eventually get an uncracked shell. If you’re working with a group of young children, it’s better to have the shells premade. It lessens your and their frustration.

3. Take a piece of thread and make it tight between your fingers. Slice off the tip of your egg to form an opening. With the point of a paring knife, scoop out just a bit of sugar to create a small cave-like look to the opening. This prevents the front opening from hardening too much while the eggshell dries.

4. If you’re making the shells ahead of time, you will be able to begin scraping out the sugar to create a shell after about an hour and a half. Use a spoon to scrape away the damp sugar from the inside of the shell. This will give you a nice thin shell. You want the shell to be 1/4 of an inch thick. If children are scooping out the eggs themselves, you may want to wait 2-3 hours, so they’re very firm. This creates a thicker shell, which is less translucent, but you will have less breakage. When I work with groups of children, I usually have the shells premade. However, it’s interesting for them to know how it was done, so I begin with a quick demonstration. In a family setting, you can let the family make their own shells or make them ahead. It will depend on your time frame.

5. Let your scooped out shells dry until very firm. You can mention to children that the shells are now concave, another learning moment.

6. Make “royal” frosting in your mixer. This frosting dries like cement. It can be made with egg whites or meringue powder. I always opt for meringue powder as the frosting is easier to make and holds up better, especially when working with children. You can purchase meringue powder at stores with a cake decorating section, such as Walmart, baker’s supply houses, and culinary stores. The directions are usually on the package. If you opt to use egg whites, you can find the recipe online.

It takes 7-10 minutes of beating time, and the frosting should look like marshmallow cream. If it’s too thin, you will need to add a bit more sugar. If too stiff, add a couple of drops of water. Make sure the consistency is easy for children to squeeze out of a bag and yet holds its shape.

I always use paste or gel food coloring, rather than liquid food color, as the liquid can thin the frosting. The paste and gel food coloring give you truer, deeper colors. A little bit goes a long way! These types of food coloring can be purchased wherever cake decorating supplies are sold, and last for years.

7. I purchase disposable decorating bags for children. I cut off the tip to make a hole. I do not use decorating tips as the frosting dries in the tip crevices, making it harder for children to squeeze it out. If you do not have access to these decorating bags, you can use a plastic food storage bag. Snip off one corner. I put the frosting into the decorating bag or food storage bag, twist it behind the frosting, and rubber band it. This helps children keep the frosting in the bag, rather than having it squeeze out the back.

8. You can use miniatures purchased at a craft store for the inside of your egg. You can also put stickers on stiff paper or cardboard and cut them out. It’s also fun for children to draw and color their own small pictures, which are treated like stickers.

9. Put a spoonful of green or blue royal frosting into the bottom shell and allow the child to spread it around with their finger. Make it thick so that whatever they put inside the egg will stand upright. The size of the shell determines the amount of frosting needed. This picture shows a fancy inside made by one of my experienced grands, but most children are happy with a bunny in some green frosting or a duck in some blue. 

10. Use a bead of the royal frosting around the outside edge of the bottom shell. I talk to children about the word perimeter here. Always teaching. : ) Now put the two halves together.

11. At this point, I talk with the children about the magic of the egg, that even adults will ask, “How did you get those little bunnies in there?” I tell them to cover the seam so no one will know how they did it. I also suggest they decorate around the front opening. Remember that some children won’t want to decorate the front opening or the seam. It’s ok. It’s their egg.

12. You can decorate your egg with frosting flowers purchased in the cake decorating section of the craft store. You can use small silk flowers snipped from their stems. You can use small candy decorations from the baking aisle of the grocery store. At Easter, there are plenty of Easter decorations available. You can even use raisins and nuts. Use your imagination. There are many wonderful ways to decorate sugar eggs.

13. Let your egg creation dry overnight before handling.

Have a delightful, spiritual, and family-centered Easter.